Here's a picture of the inside of the tank. The red circle highlights the lever. The green is the flapper valve. These are the two parts I am replacing. The lever was all corroded, which is why the chain had detached. I decided to also replace the flapper valve because the chain was showing signs of rust and replacement ones are only about $2. The lever is around $5.

The first step I did was to get the lever out of there. It screws in by the handle. Keep in mind that the screw is the opposite of the righty-tight, lefty-loosey rule. Check the threads before you unscrew and never over-torque something on a toilet. The ceramic can crack, which leads to having to replace the toilet. Also, there is no need to be concerned about sanitation when working in the tank area of the toilet. The water in this section is all clean water, although I would recommend not drinking out of it.

The next step is to shut off the water. You actually don't have to do this step, but I usually do, so it's a little easier to work. After the water is shut off, you'll need to manually lift the flapper valve, which will cause the toilet to flush. However, no new water will be able to flow to the bowl, so it will empty.

Once you've done that, you can remove the old flapper valve. There are two places it attaches to the overflow tube. They are pretty easy to remove.

You'll then put on your new flapper valve (I use the universal model sold by Home Depot) by sliding it onto the two posts on either side of the overflow tube.
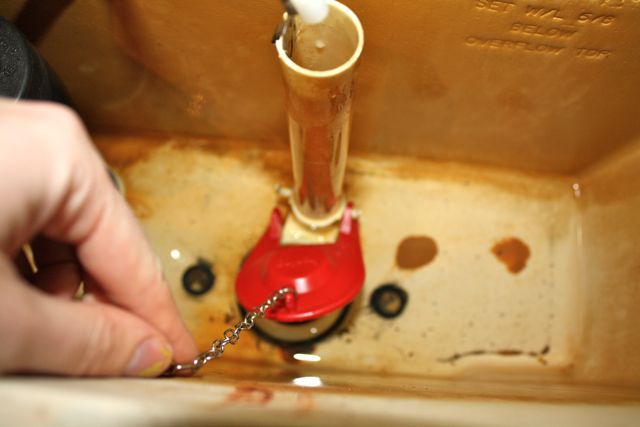
And then attach the chain to the lever. You don't want too much slack in the chain when the lever is down (so that the chain doesn't get sucked under the valve), so you can make adjustments in the chain length as necessary. The flap should be fully down when you are not touching the handle.

And there you have it. You can now turn back on the water, which will fill the tank. You should not hear running after the tank is full.

Including pictures, I think this took me a total of about 10 minutes to complete. Any home improvement store should have all the tools you need to get 'er done. So, if you ever hear the toilet running more often than it should, just replace the flapper valve! You'll only need to replace the lever if it gets corroded like ours. The plastic ones tend to last a long time. Replacing the float is a story for another day, but you will know if that part goes bad because your bowl will stop filling right. As long as you replace the insides of the toilets when needed, they can last for a very long time.
If you are interested in reading more about toilets (you know you are), you can check out http://home.howstuffworks.com/toilet.htm. Hope you didn't find this post too crappy!
No comments:
Post a Comment