Tuesday, January 29, 2013

Reader Re-design: New Mantle

I don't have any great home improvement projects to tell you about at our house. I've been having one of those weeks where grace and humility have played a prominent role. It's been a rough couple of days, but God is getting me through it. :)

So, since I don't have any personal DIY projects to tell you about, I thought I would share a project of my parents. As you may remember, I left my miter saw up in PA. And my parents decided to update their mantle.

Here are some of the "after" photos.


Here are some before pics. I took most of these from Christmas photos I had. My mom recently painted the brick. In the pic below, you can kind of see the bricks as they were before. Actually the fireplace hearth is still original (mom wants to do something with this at some point).

This is my bff, J, and me. And J on his smartphone.


And here are more "after" photos. Doesn't the trim look really amazing? They ended up buying a 16 feet piece of trim to get across the whole mantle. I still don't quite know how they got it in the car. They then painted the wood and trim a nice white color.

I'm just really happy that they were able to use the saw to make the mantle look so nice! I know these pictures don't do it justice, but I think it gives the room a nice clean feeling. You should have seen it in the 80s. The paneling and trim was all dark wood, and the carpet was orange! Anyway, a big kudos to Mom and Dad on the hard work they put in!


Wednesday, January 23, 2013

Wetness protection

Did the title intrigue you? :) I am attempting to get caught up on some blog posts I have been meaning to write. I mentioned in a previous post (quite a while ago actually) that we suffered some storm damage from Hurricane Sandy. The damage was pretty minor, just a leak at our roofline, but we decided to get it investigated. We actually thought that our roof was starting to fail us. We were under the assumption that the roof was as old as the house, which would make it about 27 years old. We had a local roofer come out to take a look. He climbed in our attic and then actually walked on our roof. He came to the conclusion that there was no way our roof was original to the house. But the plywood underneath showed no signs of a previous roof (which caused our home inspector to believe it was original). The roofer suspected that our home was one of the homes that fell under the fire retardent plywood lawsuit that affected homes, especially townhomes, built in the 1980s. I ended up emailing our HOA and did confirm that his suspicions were indeed true. Our roof was replaced at some point in the 1990s and the roofer thought it was about 15 years old. Not bad. So why was it leaking? Well, it turns out that not all of the flashing was replaced when they put in the new roof. The flashing around the chimney needed to be replaced.

Here is a picture of the original flashing (the copper stuff around the chimney).

This is just a picture of our roof. Isn't it pretty?

More flashing (up close).

I'm pretty sure every house in our neighborhood had satellite TV at one point. The antennas are pretty prolific in our neighborhood.

Here you can really see how leaks might be happening.

The back side of the chimney.

And here is the result after the new flashing was put in. The roofers also had to remove and replace the shingles around the area. But the really great thing is we went from thinking we would have to spend thousands of dollars for a new roof to spending a couple hundred on new flashing. And no more leaks!

Tuesday, January 22, 2013

Outward Appearances

Hello everyone! Enjoying the cold weather we have been having? Burr! It is actually feeling like winter around here. I'm not a huge fan. However, this past weekend was rather mild. So mild in fact that we decided to tackle more of our front door. I met with an HOA representative on Saturday morning to talk about what options we had with our front door. The answer was pretty simple. We didn't. However, our door was not painted the color it was supposed to be. She wasn't sure how that had happened, but the door on the original architecture documents was not what our door was. And I thought the original documents were actually better in terms of the color, so we decided I could color match the color samples and paint the door the color it was intended. Armed with paint samples, I got the paints color matched by Benjamin Moore. I say colors in plural because the trim around the door needed to be repainted (as you will see in later pictures), and that color was indeed correct. For both colors, I chose the exterior ben paint in soft gloss. It has a self-primer built in and seemed to coat pretty evenly. I am not a fan of Home Depot's semi-glosses, but I would also trust Sherwin-Williams for a good semi-gloss (and it is less expensive that Benjamin Moore).

Here is what we started with. As you can see, the trim and the door are the same shade. And the outer trim is all sorts of gross. The previous owners clearly tried to patch certain areas but did a bad job on the color match. Unfortunately, it was just cold and windy enough to dissuade me from tackling the outer trim, so I focused my efforts on the door itself, which could actually be painted inside with the door open.


 I actually don't have any in progress photos. I used a foam roller for the surface. I did about 4 thin coats. I then used a small brush for the area around the door handle and the creases for the panels. I removed the door knocker so it wouldn't be in the way. I also managed to sand down and patch up a few areas that were looking a little nicked up (prior to painting).

Here are some after shots. As you can see, it is just a slightly darker shade of beige/cream than the trim. I think it makes the door pop a little and really shows off the newly ORBed hardware. I need the temperatures to stay consistently above 50 to do the outside trim, so that may have to wait a little, but I am happy with the progress.


In other changes of appearance, I recently got my hair cut and decided to try bangs. No, I don't have a picture, but I will post if I do have one at some point. And no, I had no idea Michelle Obama would also get a similar haircut when I got mine. lol.

That's all for now!

Saturday, January 19, 2013

Dining room updates

Hi friends! I am, yet again, a bit behind on the blogging front. I hope you can forgive me. I actually have 2 new updates.

The first being the second set of railing dowels. This is the railing dividing the living room from the dining room. I am trying to be consistent with the dowels, so I am having to update them all. This time I think I did things a bit smarter than the ones by the front entrance, so I will be sharing my words of wisdom with you.

Before shots.

I was doing a puzzle as well.

And I forgot to take the pictures before getting out the painting equipment.

Okay, here is a step by step for my process. It ended up working pretty well.

1. Sand down the dowels. I used a pretty high grit paper. You want the surface to be nice and smooth, but one that the paint will grip to.

(You can see this project took a while. Our tree has been down for 2 weeks).

The best method I found for the circular dowels was to wrap the paper around the surface and try to keep the pressure about the same on all sides. If you press too hard the paper tends to grab the wood, so be gentle (Geez, louise, it's making me blush just typing this.)

I used a sanding sponge for the bottom.

After all the sanding, you will have a mess, so make sure to vacuum and wipe down the dowels with a damp paper towel to remove all dust.


2. Use a foam roller to apply paint. This time, I did 2 coats of primer (Kilz no VOC) and then 2+ coats of the semi-gloss paint. The primer really helped to cover the wood (much better than without). The foam roller allows for thin even coats. Make sure not to have too much paint on the roller. You do not want drips.

3. Apply paint with a small brush (not pictured). I show this in my first dowel post. I use an arts and crafts brush to get the ends of the dowels (where they meet the unpainted wood) and in the crevices.

Here is a picture of everything after priming.
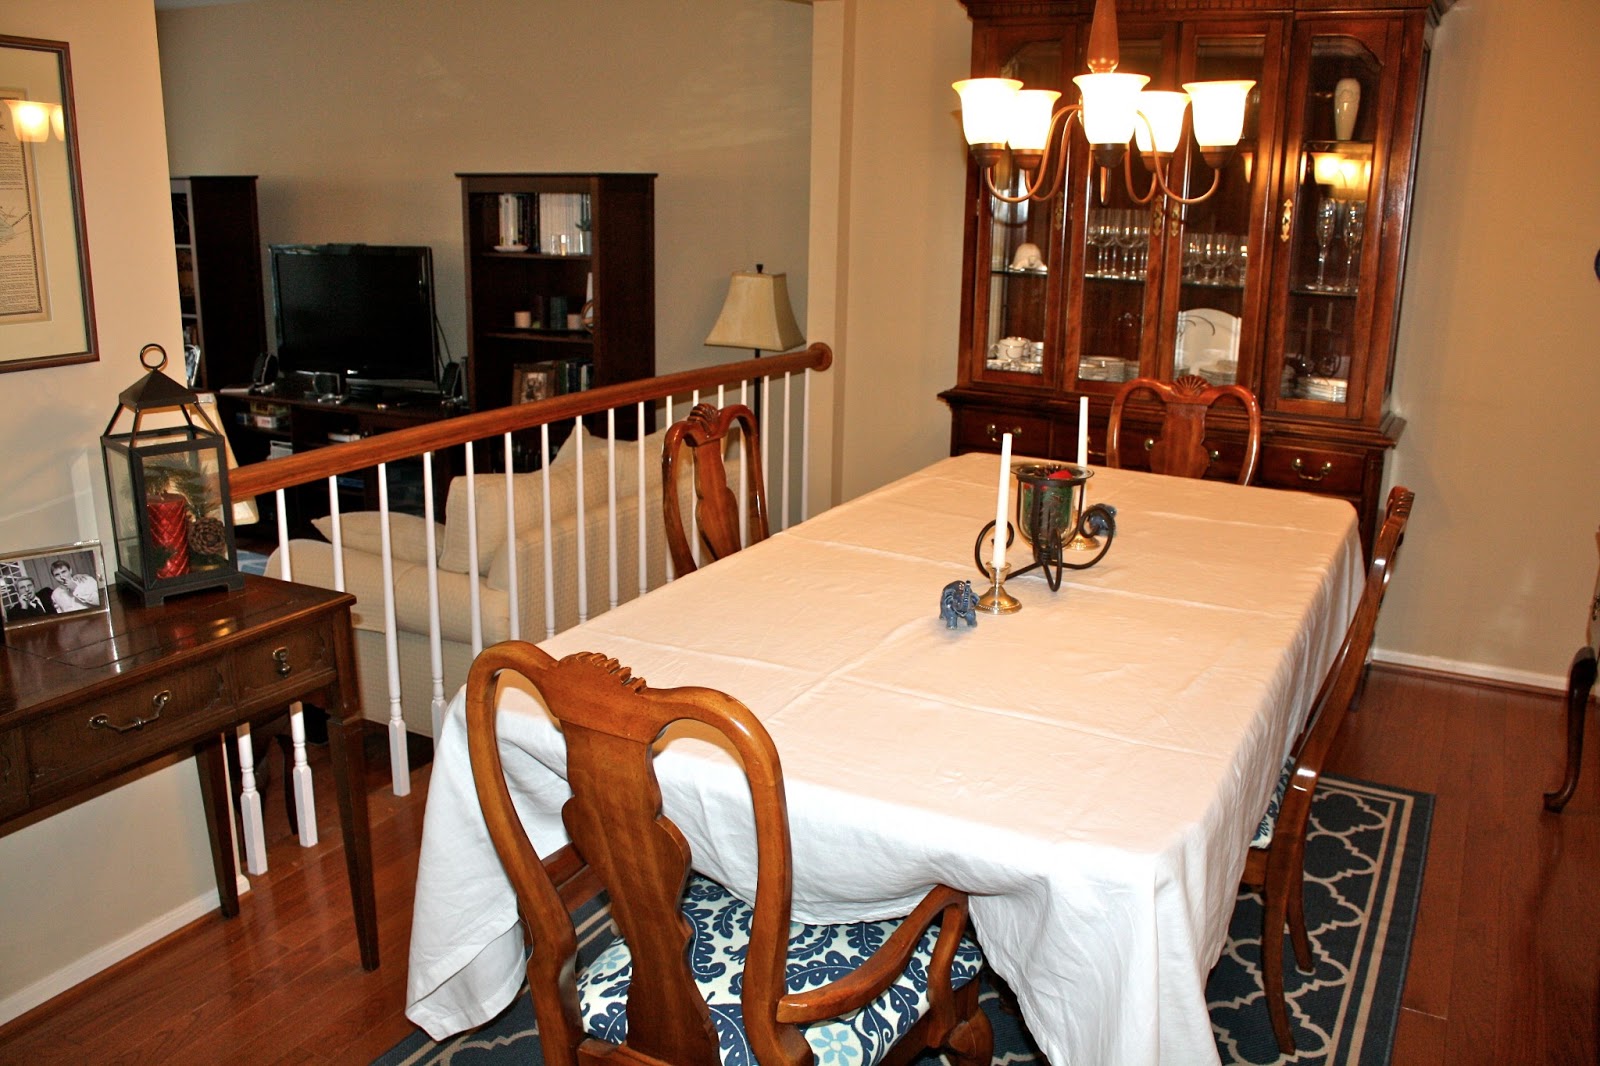
After pictures:


Did you notice my second update in the after pictures? We got a new tablecloth! I have been wanting an everyday white tablecloth since we bought the table. J's aunt and uncle gave us a gift certificate to Pottery Barn this past Christmas, and I wasted no time in spending it on this lovely addition to the dining room. It's linen, simple, elegant, and just perfect. (A big thank you to Aunt S and Uncle J!) Now, only 2 more sets of dowels to go. I'll probably just show before and after pics after this post. I think you get the general idea at this point. :) And I will be back with more exciting projects soon.

Sunday, January 13, 2013

A Welcoming Front Door

Hello all! Today's post is more or less a continuation of last week's post. After living with the front door knob for a few days, I decided that it would be better to ORB (Oil Rubbed Bronze) the glass door in front of the main door as well. It kind of looked odd with a mixture of brass and ORB.


The first step was to remove all the door's hardware. Unlike the main door, there was no real replacement kit, so the best way to do this is to paint. (Trust me, I have seen this done on multiple DIY websites before). 


I used some liquid deglosser to rough up the pieces. I opted not to sand the pieces, but you can use some very high grit sandpaper if you would like. 

I also removed the door kick (is that the right word), which was really dirty. I cleaned it all up before using the deglosser.

Since yesterday was so warm, it was picked for the spray painting day. I thought today was also going to be nice to allow more outdoor drying time, but instead, J and I were quickly moving pieces back into the house when it started raining. :-/ Not ideal at all. I did about 3 coats on everything to get good coverage. I still noticed a few small spots that weren't perfect. It would have been better to have another day to touch up the paint, but the weather did not cooperate. I think it will be okay, but I am somewhat of a perfectionist. :)

I also spray painted the door knocker to match everything. I covered the eye hole with painters tape during the spraying, which seemed to work perfectly.

Finished results.

It's a much cleaner look with everything in the same color.

I even removed the screws for the door knocker and sprayed them. They had previously been painted over.

Before:

After:

The ORB also seems to go pretty well with everything else outside (light, railing, etc.).

I think this is the end of my door updates (at least the front door) for now. I would still like to update some of the upstairs doors, but we can wait a little to do it. While I was doing these updates, I also cleaned the front door with vinegar. It seemed to help, but it also reinforced that the front door needs a fresh set of paint in the spring. And I will keep everyone updated on how the paint job holds up. Hope everyone is having a good weekend!

Sunday, January 6, 2013

Under lock and key

Happy New Year! I hope you all had a safe and happy start to the year. We have been having a good year start. We had a lovely New Years Eve. We had a fancy dinner and spent a nice night in. It was honestly perfect. We usually are out until all hours of the night NYE, so it was nice to just be home and enjoy being together. I haven't been quite as productive as usual with projects. I have actually been enjoying (rather than updating) the house more recently. You can guarantee that will change as I always have lots of ideas for how to change things up. Like today for instance. After church, J and I swung by Home Depot. Friends of the family had gotten us a gift certificate, so we naturally spent about 4 times the worth on the card. :) What I actually meant to buy (and did) was a kreg jig for woodworking projects. It allows you to make pocket holes (as I had to explain to the employee in the tools department). But, that's not what today's post is about. We also picked up some door knobs. I have been meaning to do this for ages, and finally got around to it. We got one for the half bath on the main floor (which desperately needed it) and the front door (which also was looking in bad shape).

Here are the half bath before shots. Pretty 80s huh? Also, it was not going well with all the updates in the powder room.


We chose Oil Rubbed Bronze for the updated look. J was pretty excited that it was the finish I wanted, too. I basically followed instructions. Actually, I used spackle to fill in gaps from previous knobs, like the one below (after picture to follow).

And this one where I squeezed in some spackle before screwing it in to fill out the non-square edges.

The front door "before". We have always hated this lock since you have to use a key on both the inside and out. So, we got a new one that has a lever (not sure the right word - the thing you turn to lock it) on one side and keyed entry on the other. After doing some research, I am fairly certain that this lock was original to the house, so it's probably good that we are updating it. (And yes mom, we will give you a new key to the house.)


Again, I had to make some corrections with spackle. I know this looks rough, but after painting it and installing the hardware, it looks really good.

The after pictures.


See how much better spackle + paint makes this look?


And now that the knobs are switched out, I can officially call our powder room completed!


And here's another picture of the light for good measure.

I am not sure I can really impart any real wisdom with switching out knobs, except to follow instructions and be patient. It was kind of interesting for me to look at the locking mechanisms. I had never really thought about it much before. Also, there are a wide variety of front door handles. We went for something modern but simple. I also am updating the door knocker to match, but I will get to that later (like when I am done) and will take a bigger picture of the front door. I hope you all had a wonderful weekend!