Monday, May 27, 2013

A fresh look for the front door

So, if you read my blog post from yesterday, you are probably wondering what I was working on while J was working on the shed. I had already painted and re-painted the front door, but the trim around it wasn't looking too hot.


There were also some places in need of patching up (caulk and wood filler).

I think the previous owners had tried (unsuccessfully) to paint over some of the trim spots, but they didn't get the color match quite right.

So, in terms of steps of what I did:
1. Caulk and patch the cracks in the door trim.
2. Use liquid deglosser to clean and rough up the paint surface.
3. Prime with Kilz white primer.
4. Paint with exterior paint.

After the priming step:


I had exterior paint color matched to the original manufacturer's paint (which I got from the HOA). For the record, the color looks less peachy in real life than it seems to look like in these photos.

As you can see, it is a much cleaner look and there is no longer any discolorations, or peeling paint, or cracks.


I am super happy as I have been meaning to do this forever and it looks so much better than it did before.

I hope everyone had a fantastic Memorial Day weekend!

Sunday, May 26, 2013

Shut the shed door

Happy Memorial Day weekend! I hope all my readers are having a restful and fun holiday. J and I decided to stay in town and get some stuff done around the house and mentally prepare for a busy summer ahead. We also had a fun dinner with J's parents. J offered to help me yesterday and asked if he could do something, so I offered installing a latch on the shed. We had picked up the latch last weekend at Home Depot, but I just never had the time with everything else going on.

Just to give you a picture of what shed I am talking about, this picture was taken last year after my parents helped us clear out the downstairs area. It looks largely the same, except a few more leaves. The shed is on the left. It locks but there is no handle and we don't store anything of value in it (mostly a few yard tools and junk from the previous owners), so we don't keep it locked.


As such, the door kept getting unhinged, which bothered me. I would much rather it shut completely. And for about $3, that goal was achieved.

J installed the black latch such that the door now successfully stays shut!

So, a big thank you to J. It definitely saved me time. I'll get to what I was doing in the meantime in the next post. :)

Wednesday, May 22, 2013

Final balluster post!

Okay guys, second half of "things that were accomplished this weekend." I am finally done the ballusters! I definitely did not imagine that it would take me until May to finish this project when I started it back in December.

Related posts:
Dining room ballusters
Stair ballusters

Anyway, this is the final installment. Since this set was on carpet, I decided to skip the sanding step and use de-glosser and primer on the dowels, which worked very well.

Before:


After (1-2 coats of primer, 2-3 coats of semi-gloss - Sherwin Williams):


After the ballusters were completed, I also decided to tackle the door to our bedroom. I had picked up a new oil rubbed bronze door handle from Home Depot recently. So, before painting the door, I removed the old bronze door handle, which made painting easier.

I think the key with painting doors is using a foam roller and then using a small brush to touch up and get into crevices. Since the door was a peach color, I didn't need to prime it first. The Sherwin Williams cabinet and trim paint seems to cling really well without it.

An hour and a half later (I watched Pitch Perfect), the door was done!

I love the way it looks without the peach trim. Now to tackle the other 4 upstairs doors...

It's actually amazing how fresh paint can really brighten up the house. :) So sick of the peach trim.

Sunday, May 19, 2013

Spring Cleaning

I actually got quite a few things accomplished this weekend, so I will have a follow up post at some point soon.

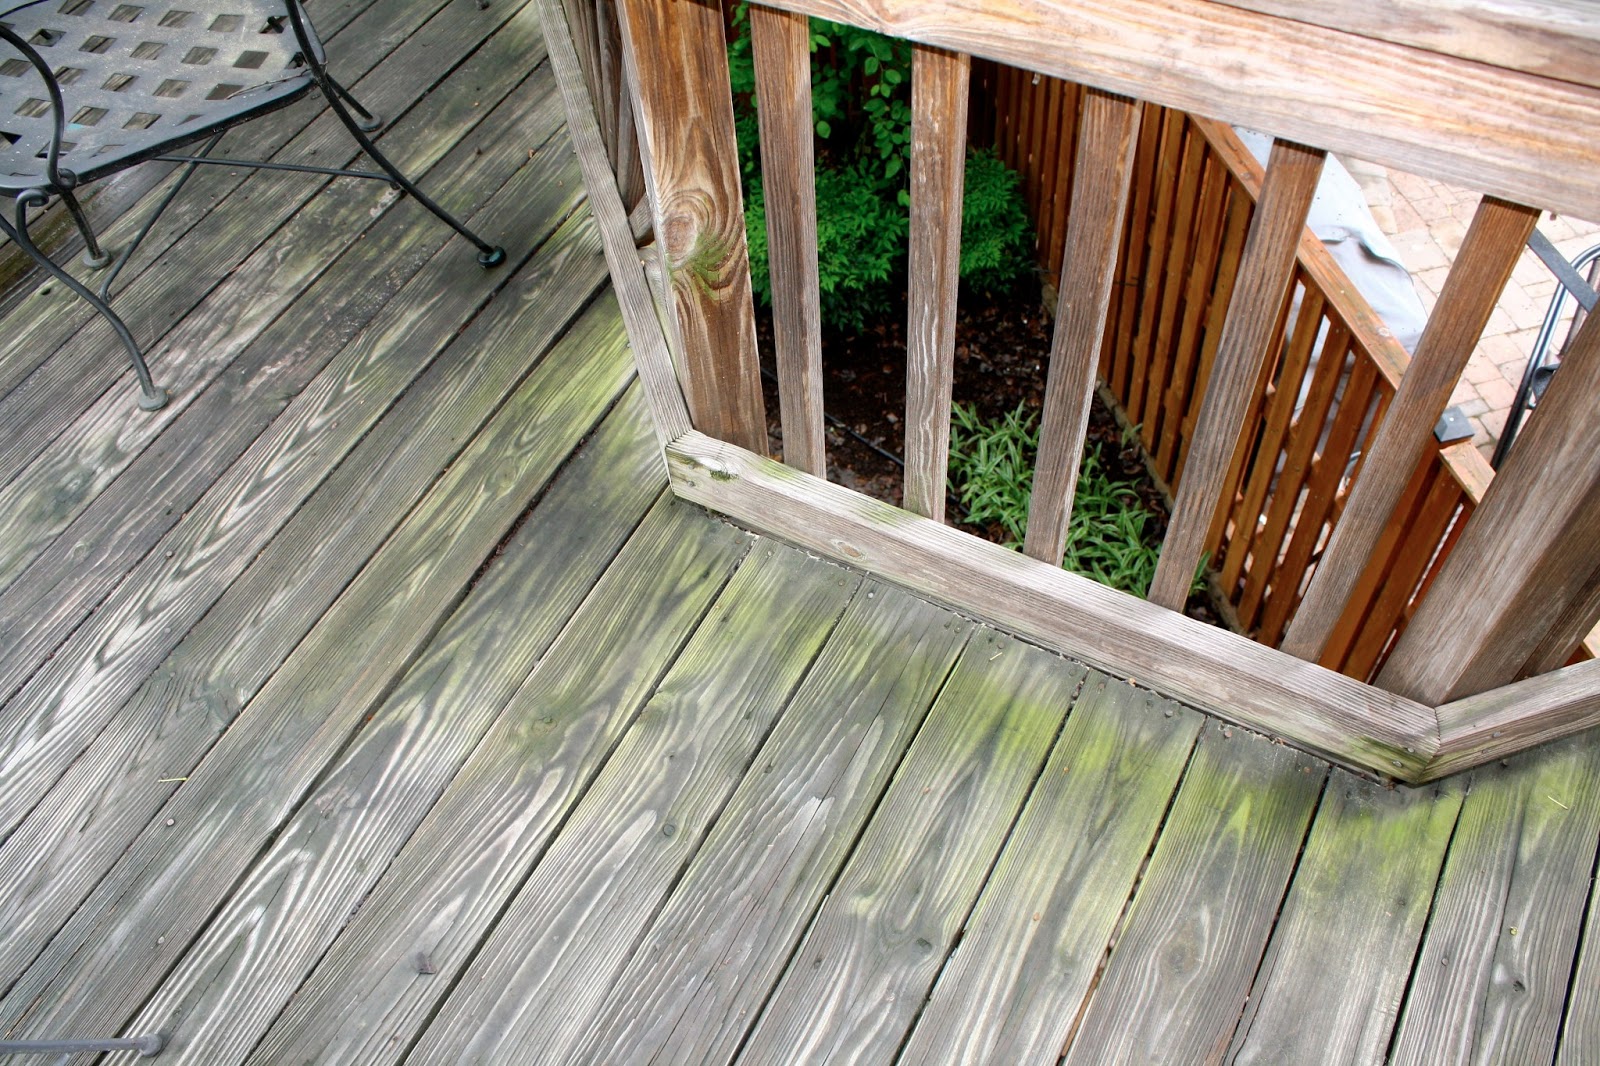
One of the things that I tackled was cleaning our deck. I had actually swept and rinsed the deck yesterday before using a deck cleaner on it today. This green algae had attacked the deck this Spring. Actually, I had been seeing this stuff on everything recently.

Before:


I got this spray on deck wash from Home Depot that you connect to the garden hose and spray on. You are supposed to leave it for 10 minutes. I also used a scrub brush to put some elbow grease into it (sorry for looking like a hot mess in these photos). Just as an FYI, using elbow grease is much better on decks than power washing, which can damage the wood and make it harder for stains and sealants to work.

You could actually see the algae coming off the wood and being pushed by the brush.

I then rinsed off the deck and let it dry. Admittedly, I didn't get it looking perfect, but it looks a lot better.

See, no green (well, except the parsley). I have thought about staining and sealing it, but that just feels like more work than I would really like to put into it. We'll see.


I also decided to give the shower a deep clean. The grout lines weren't looking too hot.

I first took care of cleaning the grate and pipe, which can get kind of nasty over time.

I then saw this trick on youtube of using duct tape over the grate and then filling up the shower with a bleach solution.

There's water and bleach in the shower (hard to see).

I let it sit for about 2 hours and then let it drain. After it drained, I noticed we had a shower monster lurking in the pipes, so I fished it out. What is a shower monster you ask? Well, it's what happens when you have a female in the household. It's basically a soap-scummed ball of hair, and it's really gross. The best way to fish them out is with a bent hangar. And if you let it go, you will eventually have water draining problems.

After everything had been cleaned and dried out, I sealed the grout and tile again. It's a simple wipe on solution you can pick up in the tile section of home improvement stores and will protect against future mold and mildew.

I have to say, I am pretty tired at this point. Cleaning can be tiring!

We also did some fun things this weekend as well - we saw Star Trek 2 (awesome) and saw some friends on Saturday. And this morning, we made it to church again, which was good (since it's been a few weeks). I hope you all had great weekends!

Thursday, May 16, 2013

3...2...1... Water!

Wow, it's been a while. I do apologize. I went up to visit my parents last weekend for Mother's Day, and then just have not been as "on top" of my home improvement projects as I should have been. One update (?) we had was that our downstairs mini refrigerator broke. Well... not so much broke as got broken. So, J had noticed that there was so much frost in the freezer that it was pushing open the door. And decided to chisel away at the ice. And broke the freon line. So, note to others, make sure you defrost your fridge by turning it off and not chiseling away at ice, not that I am particularly blaming J. I didn't really know before this incident either. :) It actually gives us a little more incentive to make that mini-bar area a little nicer than it is currently. I have ideas.

Anyway, last summer I mentioned wanting to get an automated timer watering system going for our front yard. Our spigot is a little hard to reach and it gets tedious keeping things watered. And as a result, the flowers start to wilt as you can kind of see from these photos.


I ordered a water timer and a sprinkler hose from Amazon. The hose can be pointed up for sprinkler or down for soaking. For now, I am setting the timer to run once a day in the AM for 20 minutes and can always up that as it gets warmer.

I laid out the hose so that it reached a good portion of the plants.

And did a trial run. Worked well!

So, I went through a buried the hose a little into the ground/mulch. You can still see it running across the front steps, but I don't really have a solution for that right now and it may stay like that unless the hoa complains (I guess I could always spray paint that section of hose beige?). I am hoping this will help our flowers stay looking nicer this summer!

I hope my readers have all been doing well. Did you watch the last episode of the Office tonight? I'll admit a shed a few tears.

Sunday, May 5, 2013

Caulk Job

Hi everyone! Here we are at the end of another weekend. Happy Cinco de Mayo and May the Fourth be with you. Okay, I'm done. I'm rather tired, but I'll try to make a good post for you. I did not get nearly as much accomplished around the house this weekend as I intended. I have been meaning to go to Home Depot since Thursday. It didn't happen. Oh well. I did get to see the girls from my old Bible Study this weekend. They all came over on Saturday and we got to catch up, which was really, really nice. I went to see Ironman 3 on Friday with J and one of my coworkers, which was a lot of fun (definitely a good movie). And Saturday night ended up being quite an adventure for a couple of reasons. There are some days where I am just in awe of the way God protects us and today/last night was definitely one of those days.

After all that, I was dragging a bit today. But, I still managed to get some stuff accomplished around the house. One of those things was caulking. I have actually been meaning to do this for a while, but hadn't gotten around to it. I was cleaning the front door today (not pictured) because I want/need to repaint the trim around the door. There were a few spots there that needed some caulking, so I finally got out my caulking gun to get the job done. I forgot to take a picture, so here is a stock photo of a caulk gun. You basically cut the tip off of the silicone tube and apply pressure via the trigger. The important thing with the operation is to screw the back metal piece clockwise when you want to operate it and counter-clockwise to stop the flow. Otherwise, you can end up with a mess.


I'll share the door caulking when I post about the door painting. But, I also tackled the upstairs guest bath. The caulk around the sink wasn't looking too great and was cracked in places.

Before (click on the images for zoom):


The best way I found to apply the caulk was doing the best you can to apply a thin line and then go over the caulk with a slightly wet finger to smooth it out. You'll also want a wet paper towel on hand to clean up any messes. The caulk is water soluble when wet, but is really tough to clean up once it has been set.

After:


Another problem area was around the tub in the guest bathroom. The previous owners must not have followed any of my advice about caulking and it was very uneven and blob-looking. I haven't been noticing any leaks, but it didn't look too good. So, I ended up going over the old job with a new line of caulk and just smoothing out the seam with my finger. 

Before: 


After:


As you can see from the after pictures, it looks much crisper now. It was actually one of the things that really bothered me about this room, so I was happy it was such a fast and easy fix. I only wish I had done it sooner. 

I kind of have 2 projects going on at once, so I will certainly be writing again with whichever gets done the fastest.