Sunday, August 28, 2011

greenery

First of all, the hurricane didn't really affect us too much except for a 2 hour power outage. It looked like overall there were a few down trees in our area, but that was about it.

Secondly, I have been working on a flower pot for the past week, and just today actually planted my plant in it. I have wanted to work with chalkboard paint for a long time now, pretty much since I heard about it. I picked up a good sized flower pot at AC Moore along with some chalkboard paint. I opted to go with the acrylic version rather than the spray paint due to my previous problem with getting spray paint in my nasal passageway.

I used thin and even coats of the paint and let ample time to dry. The paint container said to wait at least 20 minutes between coats, but I actually just painted a coat a day until it was fully covered and no orange was showing. This is what it looked like after 1 coat. I did 4 coats total.

I didn't end up taking any other intermediate photos, so here is the final result with potted plant.


I figure I can change the chalk message during different seasons and holidays. I didn't really want to put "Happy Labor Day" or something, so I went with a motivational message for now. I'll probably change it in the fall.

My mom also brought some dried Hydrangeas from her Hydrangea bush, which I am now using to decorate in the dining room and the guest bedroom. Aren't they pretty?


I also slightly moved our Hydragea bush today as well. Our neighbors re-did their landscaping, including taking out some bushes that were encroaching on our lawn, so I moved the Hydrangea to make the space seem more even. I also think I did a better job at digging the hole this time around and mixing in the fertilizer.

Saturday, August 27, 2011

Hurriquake

Nothing like having an earthquake and a hurricane in the same week. I meant to make a post earlier this week, but I was pretty busy. Now, I am posting in the middle of Hurricane Irene. Anyway, this week, we experienced a very rare earthquake - magnitude 5.9 at epicenter in Mineral, VA. Our house actually did get some minor damage due to this earthquake (but I really do mean minor - more of annoyances than problems). The biggest issue being that the upstairs (i.e. 2.5 floors above ground) walls shook a little too much causing the drywall nails to tear through the paint -- but only in the rooms that I had painted. Of course. 


So, I will need to spackle and paint these areas. My mom said that the best way to nail these back in without damaging the paint is to put a sock over the hammer. However, I have another problem in that the nails went all the way through.

We also had an issue with our upstairs lighting fixture. At first we weren't sure what this was, but upon looking up, we figured out that the band around the light shook down.


And the worst part...

Just kidding. Actually, we were pretty disappointed about the loss of one of our vases that was a centerpiece for my MD bridal shower. And the second being a picture frame of J's 311 stuff that shook off the mantle and broke. Luckily, nothing else was damaged.


Now, we are sitting through Irene. We have taken in much of our outdoor stuff in (including the umbrella), and I have "bottled" about 3 gallons of our own bottled water (use of mason jars #134). We have flashlights and candles so we'll see how this all goes. Stay safe friends.

Sunday, August 21, 2011

Creative Word Play

If you have gotten to know me, you know one of my passions is reading. I can sit all day with a cup of coffee and a good book and be perfectly content. I inhale books. Getting the Kindle was fantastic as our bookshelves were overflowing. I also love quotes. This weekend, I decided to get a little creative along this theme. This first idea started after having brunch with a friend on Saturday morning. Afterwards, I was wandering around the nearby shops, and walked past The Paper Source and just had to go in. I used The Paper Source quite extensively for our placecards, ceremony programs, table numbers, etc. for our wedding almost two years ago. I love this store. Something about it just makes me super happy. Anyway, I stumbled across a paper flower making kit that I decided I needed to try. I decided to modify it from its original white paper roses though.

More on this later. Of course, I also had to get more paper and other such items. All of these played into my weekend updates.

First, the quickest update. I needed to fix one of my dry erase boards that I had discussed in a previous post (made out of picture frames). The problem being the background color making my text too hard to read as shown below.

I found new paper at The Paper Source that works much better for this application. I still love the other paper so I am saving it for a future project at some point. But here is the new dry erase board. Much better, huh?

Next, I hung the frames that I had gotten from Pottery Barn (they were 20% off). In one of the frames, I finally framed a picture that was taken by one of J's family members at our wedding (I believe his father's cousin but I am not 100% on this). I really loved the picture, I just hadn't had a place for it until now. But now, it is hanging in my office / our sitting room. I also used the other two PB frames for quotes. I figure that I can switch out the quotes by printing on the different colored paper I bought. Yay for more decorations in the sitting room!


And finally on to the flowers!

I decided to do about half the flowers with the white paper provided in the kit and half using book pages. At this point, I ran into a dilemma. I was okay with cutting apart one of the books I did not like, but I didn't want to necessarily display that text as a reminder of a book I didn't care for. But at the same time, I couldn't cut pages out of a book I loved because it felt like I would be murdering the book. So, I came up with a solution. I knew that I could read books through the Kindle app on my computer (or now through "the cloud"), so I figured, I should be able to print pages of books I had on my Kindle to paper and use that. It was actually slightly more complex that that. The Kindle app does not let you actually print the pages from what you are reading (which I was actually expecting before I even tried it). But print screen solved this problem pretty quickly. A quick copy and paste and I was on my way. So, what book did I choose? After looking at my choices of books I had read, I decided on The Lord of the Rings (btw - J's reaction: "Could you be any nerdier?"). I was very close to choosing The Chronicles of Narnia, but decided against it. I would have definitely chosen Mere Christianity if it was on my Kindle, but I actually have the paperback to that one.

Basically, the idea behind these flowers was to roll the paper cutout into a rose shape and then hot glue the end of it in place.


For the book ones, I traced the pattern onto my paper with pencil.

By the way, does anyone else remember making these spiral things in school? I had a flashback to elementary school art class.

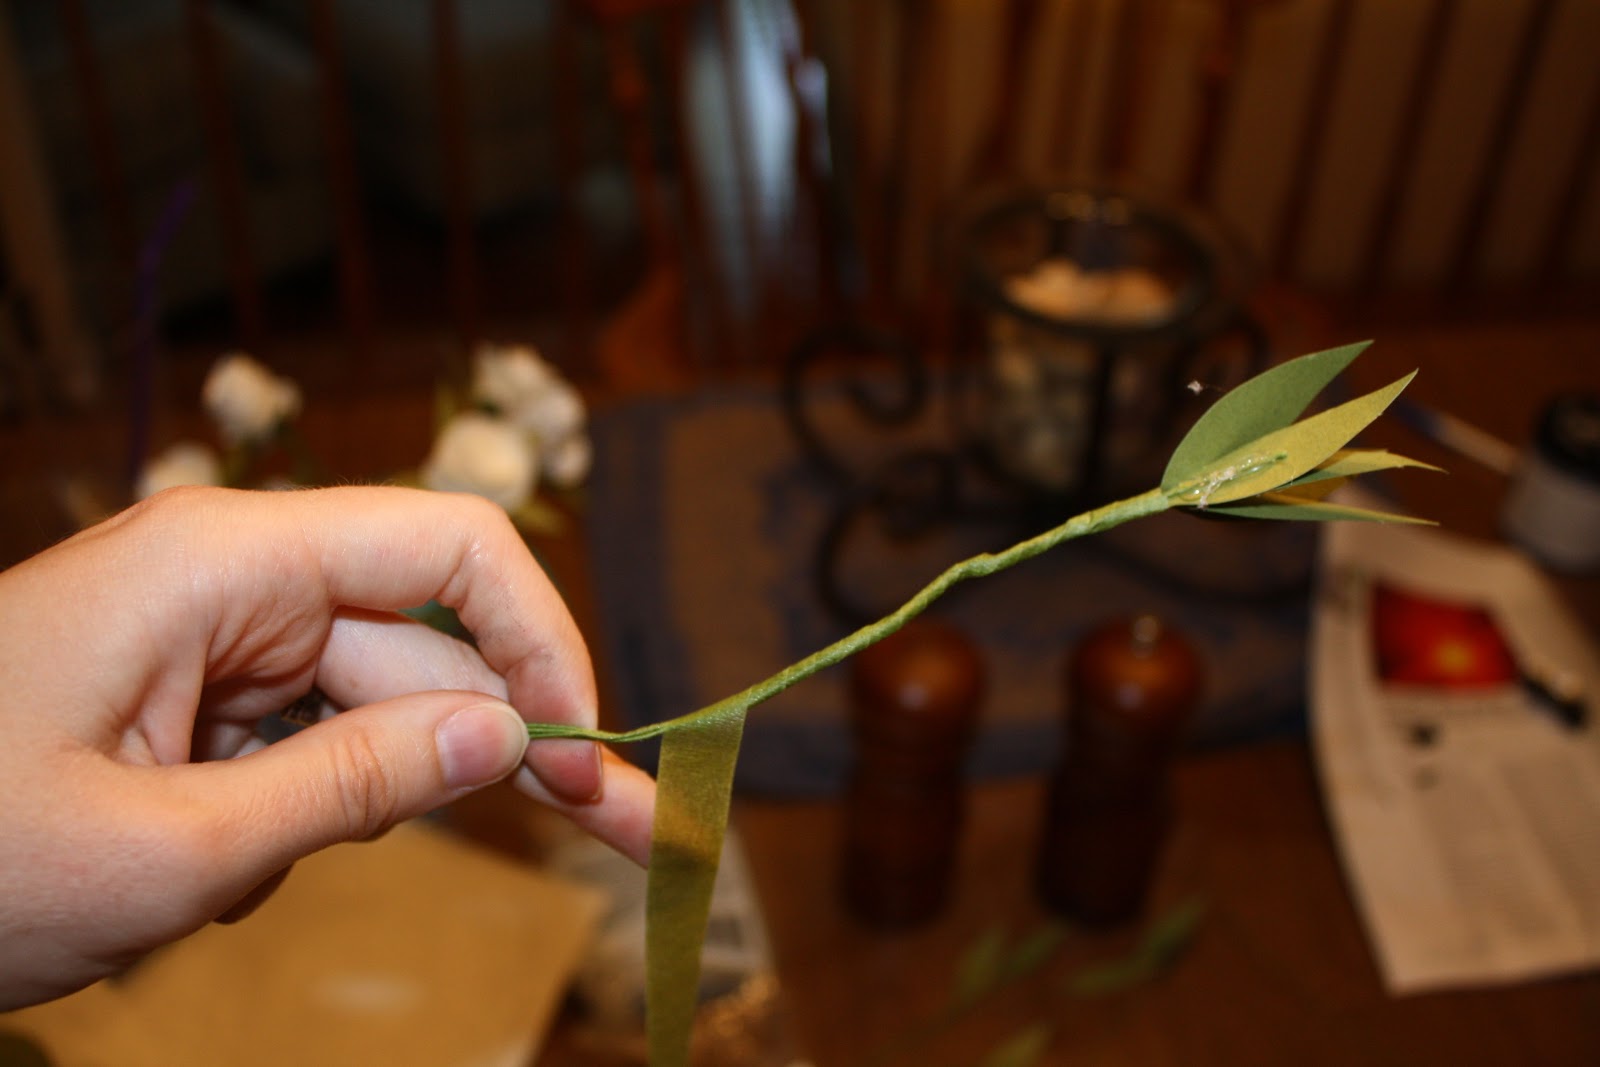
For the leaves, they were pre-cut in my kit (but would be easy to make without the kit) and I hot glued the leaves to the ends of the provided wires. Each rose got 5 leaves that were wound together with the green sticky tape that is often used for this sort of thing.


Then the rose was hot glued to the center of the bent back leaves.

I made 9 roses and put them in one of my Mason Jars I have lying around. I used the remaining book paper by shredding it and putting it as filler in the bottom of the jar.


And now, a final look at my desk with these recent updates.

Speaking of reading, though, I need to read about 10 books for the class I am auditing this fall! (And according to my Kindle, I am only 22% done the first one). I'm going to work on that right now. Happy reading!

Friday, August 19, 2011

Trim and Theology

This past week, I decided to tackle a project that has been on my to-do list for a long time. I had even bought the materials about a month or two ago. It was also one in which I gravely underestimated the time it would take to complete. What was it? It was painting the trim. I wanted to focus on two areas to narrow my scope but really most of the trim in the house could be re-done. I first wanted to do that master bathroom. This area was in dire need of trim painting after the tile job had placed a trim "shoe" around the trim, but was left primed and not painted.

Yea, it wasn't looking too pretty. Unfortunately, in the small space of the master bath, there are three doors which all required painting. If you have painted trim in the past, you know that this is all pretty precise hand brush work. I actually had a small roller on hand though which could be used on the doors (but with extreme caution). Here is another "before" shot of the bathroom.

I really wanted to brighten up the trim, so I went with "Snowbound" from Sherwin Williams for the color. They have speciality trim paint, so that is what I used. Here is a good shot of the difference in the paint color from the existing (top) to the new (bottom). Big change.

After tackling the bathroom, I moved on to the guest bedroom. From the before shots below, it is pretty obvious why this was the correct choice to move on to. The clashing of the paint and trim is pretty horrendous.


Yea, I know, pretty bad. With those window seats, this was a very time consuming effort and it took me many afternoon/evenings to finish (hence why there has not been a post in a while). I kept everything nice and moist by wrapping my brushes and roller in wet paper towels and keeping them inside a plastic bag.

You can see the difference mid way through how awesome the new trim color is looking.

Painting the trim by our brand new carpet was made possible with this tool we had picked up at the paint store. It protected the carpet quite nicely and made it easy to get down to the bottom of the trim.


Painting can be tedious work, especially this type, so I spent the time listening to apologetics sermons/lectures so I could get a little self improvement going on while doing home improvement. :) The only slightly weird side effect is that every time I look at the window, I think about "Atheism in a Post Modern Society", the bathroom door makes me think of the flood, and the guest bedroom trim makes me think of C.S. Lewis (whom I adore). At one point, I had to pause from the lectures after Ravi Zacharias made a point about evil by quoting from the diary of a leader of the Nazi party and it literally made me sick to my stomach. Just to give you the scope of how long this project took me, I listened to 3 sermons (each probably around 30 minutes), 8 lectures from the C.S. Lewis institute (about 45 minutes each), watched all of Twilight (after the Ravi episode, I needed something that required absolutely no thinking whatsoever for a little and thought a mindless movie would do the trick), and about 3 Friends episodes. Oh yea, and 3 Colbert Reports. Whew. So what is the total time here? Around 12 hours or so? Time per sq foot of paint is pretty low.

Moving on.

I am really quite happy with the finished result. See the pictures below.


So much more refreshing!

I still need to paint the trim in the master bedroom, but I need to take a small break from trim painting at this point.

By the way, if you are interested in apologetics, the C.S. Lewis institute has a great series of lectures. Allistar McGrath is my favorite lecturer. He's an Oxford professor that goes head to head with Dawkins and has some very intelligent counter arguments. Hugh Ross is also excellent (physicist).
Check it out here.

"But in your hearts set apart Christ as Lord. Always be prepared to give an answer to everyone who asks you to give the reason for the hope that you have." - 1 Peter 3:15

Friday, August 12, 2011

Getting crafty

"wait till your husbands are nice and asleep...then sneak down and start crafting.
my husband has no idea what goes on in my nightlife." -- treyandlucy.blogspot.com


I saw this quote and it totally made me laugh... because I sometimes do this. :) Anyway, I have been getting a little crafty this week with two projects: a door wreath and dry erase boards for my office area. I'll start with the wreath idea (which was inspired by a pinterest re-pin). I bought all my materials from Michaels: the (fake) hydrageas, wreath, and "Z". I basically hot glued all the items to the wreath (while watching Iron Man 2 with J). 


The dry erase boards were also super easy. I bought inexpensive white frames from Michaels and scrapbook paper and placed them in the frames. The glass is super wipe-able with the dry erase markers. I love the way they look. I plan on decorating more of the space with pictures and quotes as I get around to it. But at least, it's a start.